Chick Egg crochet pattern

Free Chicken egg crochet pattern
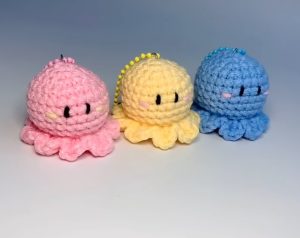
Today I will share with you the Chicken egg crochet pattern, this is a simple crochet pattern, very easy to make, the flexibility comes from changing the iron color of the egg, now let’s get started.
Abbreviations
rnd – round
st – stitch
SC – single crochet
sc2tog -2 st together with sc (decrease)
* * – repeat from *to*x times
Materials Chicken egg crochet pattern
2.5 mm crochet hook
embroidery needle
sport weight yarn in 3 colors
(A-white, B-yellow, C – lilac)
orange embroidery yarn
4 mm black eyes
soft stuffing/polyester fiberfill
Color Change
The success of your crochet depends on the right technique of changing color. It is crucial to change the yarn while working the last stitch in the initial color. That is: Insert hook into indicated stitch, yarn over and pull up a loop. Then wrap the new color around your hook and complete the stitch as usual by pulling the yarn through both loops on the hook. The next stitch is the first in the new color.
Note on Instructions
Use color A for instructions written in black and color B for deep pink.
Rnd 1: 6 sc in magic ring
Rnd 2 :*2 sc in next sc* 6x [12]
Rnd 3: *2 sc in next sc, 1 sc* 6x [18]
Rnd 4: *2 sc in next sc, 2 sc* 6x [24]
Rnd 5: *2 sc in next sc, 3 sc* 6x [30]
Rnd 6: *2 sc in next sc, 4 sc* 6x [36]
Rnd 7: 36 sc
Rnd 8: 36 sc
Rnd 9: 36 sc
Rnd 10: *2 sc, 1 sc* 12x
Rnd 11: 1 sc, *1 sc, 2 sc* 11x, 1 sc, 1 sc
Rnd 12: 1 sc, 1 sc, 34 sc
Rnd 13: 36 sc
Rnd 14: *7 sc, sc2tog* 4x [32]
Rnd 15: *6 sc, sc2tog* 4x [28]
Rnd 16: *5 sc, sc2tog* 4x [24]
Rnd 17: *4 sc, sc2tog* 4x [20]
Place the eyes between rnd 16 and 17, 4 st apart {counted in rnd 16}.
Embroider the beak in rnd 15.
Stuff the egg.
Rnd 18: *3 sc, sc2tog* 4x [16]
Rnd 19: *2 sc, sc2tog* 4x [12]
Rnd 20: *1 sc, sc2tog* 4x [8]
Finishing
Fasten off and leave a long tail to close the hole. But before closing make a hanger:
Change to color C, leave a long thread at the beginning and crochet chain stitches (approx. 14 cm). Fasten off and leave a long thread again. Knot both threads to make a loop and cut the ends short.
To close the hole, thread the long tail onto a needle (see next picture, it shows the steps of closing):
(1) Insert the needle into the next front loop from the outside to the inside. Repeat for the next 7 stitches. \
(2) When you have drawn the thread through each stitch, put the knotted part of the loop into the opening and pull the thread tight.
Draw the thread through the loop too and tie a knot to secure. Weave in the end.
