Free Glasses holder pattern
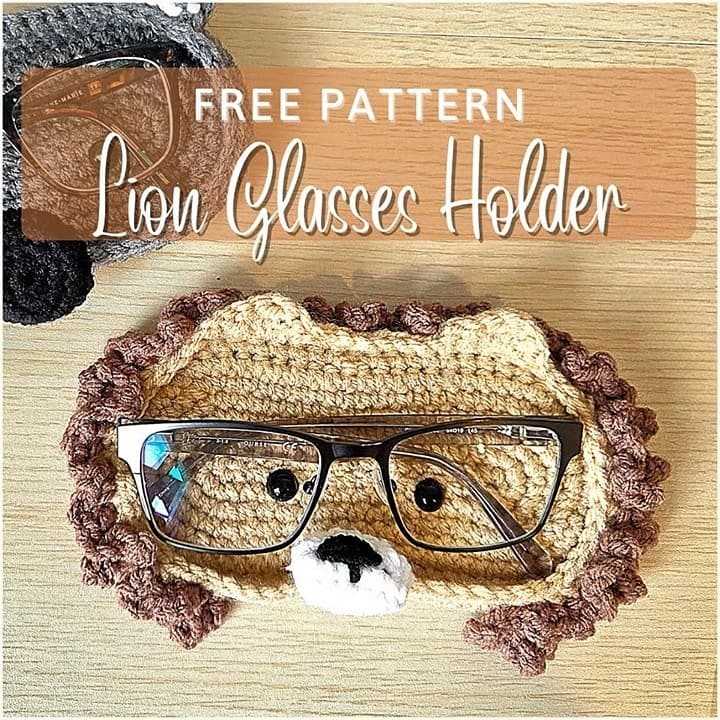
Free Glasses holder crochet pattern
Have you ever thought about making your own wool glasses holder? Not only does it help protect your glasses from scratches, a handmade glasses holder is also an extremely cute, compact and personal accessory. Let’s take a look at this free Glasses holder pattern right now.
Before You Begin!
Tension and hook size MATTER since this is a FUNCTIONAL crochet piece. After R5 of the base, measure your piece! It should measure approx: 5cm by 15cm
Adjustment Suggestions
To make your case bigger:
(a) increase hook size or (b) use a bigger yarn
To make your case smaller:
(a) decrease hook size or (b) use a smaller yarn
If you use a bigger yarn, you may want to only use 1 base, as it may become “too thick” of a base. If this is the case, you may want to use felt eyes instead.
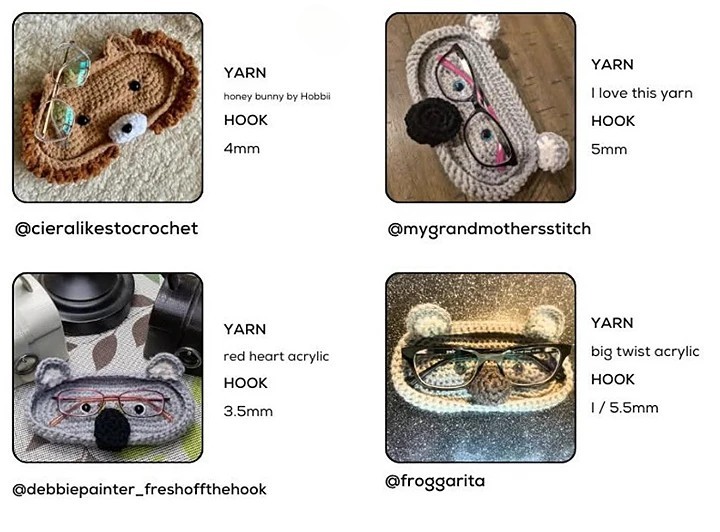
Note: Some of these images are from my koala glasses holder, but I’ve included them
to give you an example of the difference yarn / tension / hook size can make!
 ABBREVIATIONS
MR – magic ring
sc – single crochet
inc – increase
dec – decrease
dc- double crochet
hdc – half double crochet
trc – treble crochet
ch – chain
MATERIALS
– Hook: 3.5mm
– Yarn medium (4):
– Loops & Threads Soft Classic Acrylic (beige)
– Loops & Threads Soft Classic Acrylic (brown)
– Loops & Threads Soft Classic Acrylic Black
– Loops & Threads Soft Classic Acrylic White Sewing Needle
– Scissors
– Size 10mm safety eyes
BASE
Using beige yarn
(MAKE 2)
Ch17, begin in 2nd chain from hook
R1: inc, 14sc, inc, on the other side of the chain, inc, 14sc, inc (36)
R2: inc x2, 14sc, inc x4, 14sc, inc x2 (44)
R3: (1sc, inc) x2, 15sc, (inc, 1sc) x3, inc, 15sc, inc, 1sc, inc (52)
R4: (2sc, inc) x2, 16sc, (inc, 2sc) x3, inc, 16sc, inc, 2sc, inc (60)
R5: 1sc, (inc, 1sc) x2, 1sc, inc, 18sc, inc, 2sc, (inc, 1sc) x2, inc, 2sc, inc, 20sc, inc, 2sc, inc (70)
Fasten off first piece, continue to next part with 2nd piece
Measure your base! It should be approx 5cm by 15cm (or large enough to fit a pair of glasses!)
Inserts eyes into the first piece we made. They should be placed in the 2nd row (1 row down from the center), about 10 stitches apart.
R6: 70sc (70) (both pieces) — do not stuff!

R7: 4sc, dec, (10sc, dec) x2, 9sc, dec, (10sc, dec) x2, 5sc (64)
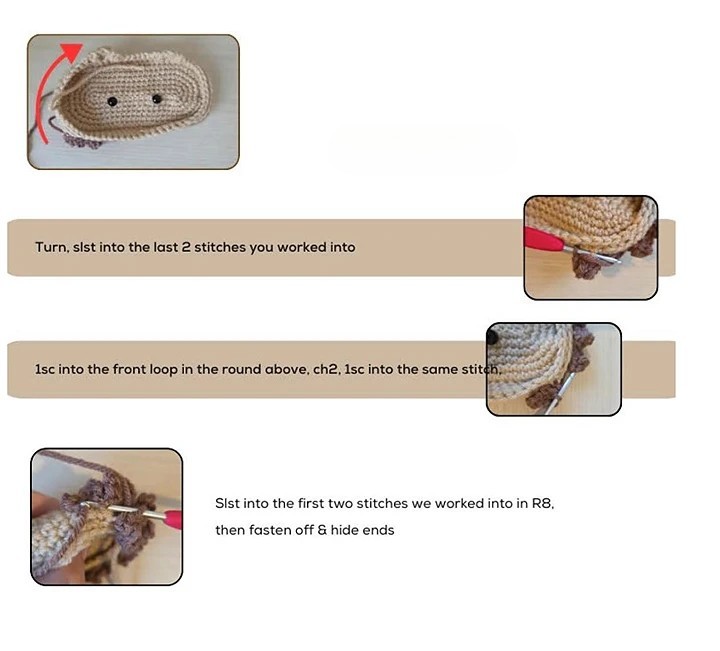
R8: BLO 42sc, 15sc, BLO 1sc (place stitch marker here), 6sc (64)
R9: [BLO 5sc, dec, 4sc, ch1, (1ST hdc, dc), (1ST dc, trc, dc), (1ST dc, hdc), 3sc, dec, 3sc, ch1 (1ST hdc, dc), (1ST dc, trc, dc). (1ST dc, hdc) 3sc, dec, 8sc, dec], 8sc, dec, 8sc (BLO dec, 2sc)
Slst into the next stitch of the first round.
Fasten off & hide ends
NOSE
Using white yarn
Ch6, begin in 2nd chain from hook
R1: (inc, 1sc) x2, inc, continue down back of the chain, (inc, 1sc) x2, inc (16)
R2: 16sc (16) R3: dec x8 (8)
Fasten off, leaving a long tail, and pull through remaining 8 loops to close
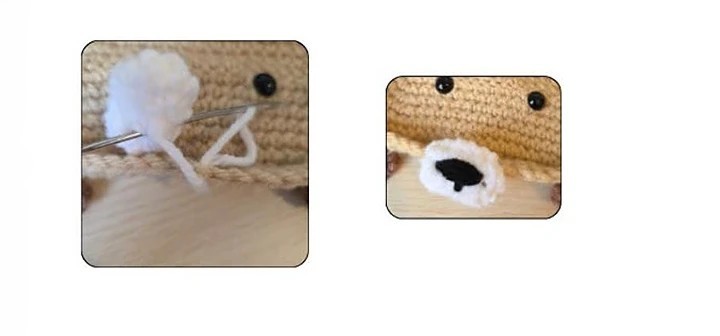
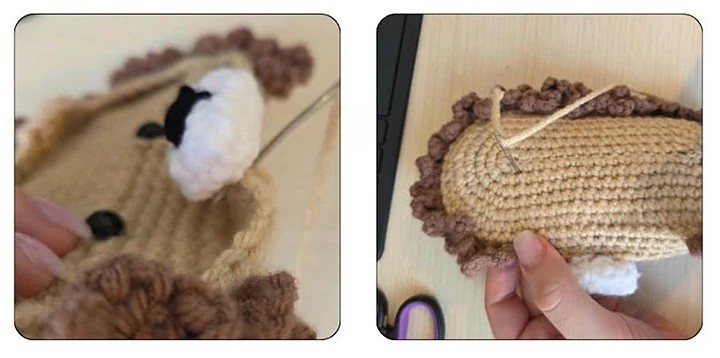
Sew down onto the top of R9 in the front, center of the face. I like to sew the top flat also.
Embroider on the nose details using black yarn. I embroidered across 3 stitches wide 4 times, then 1 stitch down the center.
Fasten off & hide ends inside the nose.
 THE MANE
Using brown yarn
Pull up a loop in the stitch we left a stitch marker in (R8)
[1sc, Ch5, 1sc into the same stitch, 1sc, Ch4, 1sc into the same stitch]
Repeat this around all front loops in the lions mane.
Continue working into the front loops in R9
FL R9: [1sc, chain 2, 1sc into the same stitch] repeat around entire row
SEW FOR EXTRA SECURITY!
The purpose of this final step is to secure the base and the front of the lip.
Using the same color as your case, sew the pieces of the base together.
I specifically sewed around R2, as this gave the most security to keep the eyes from moving.
Then, sew the front lip of the case down onto the base (see photo). This will help strengthen the base from falling forward with the weight of the nose.
If you are looking to make a glasses holder whenever needed or you are looking for a small, meaningful gift to give to friends and relatives, this is definitely a great choice. I hope you will like this crochet pattern.