Small black Cat crochet pattern
Free small black Cat crochet pattern
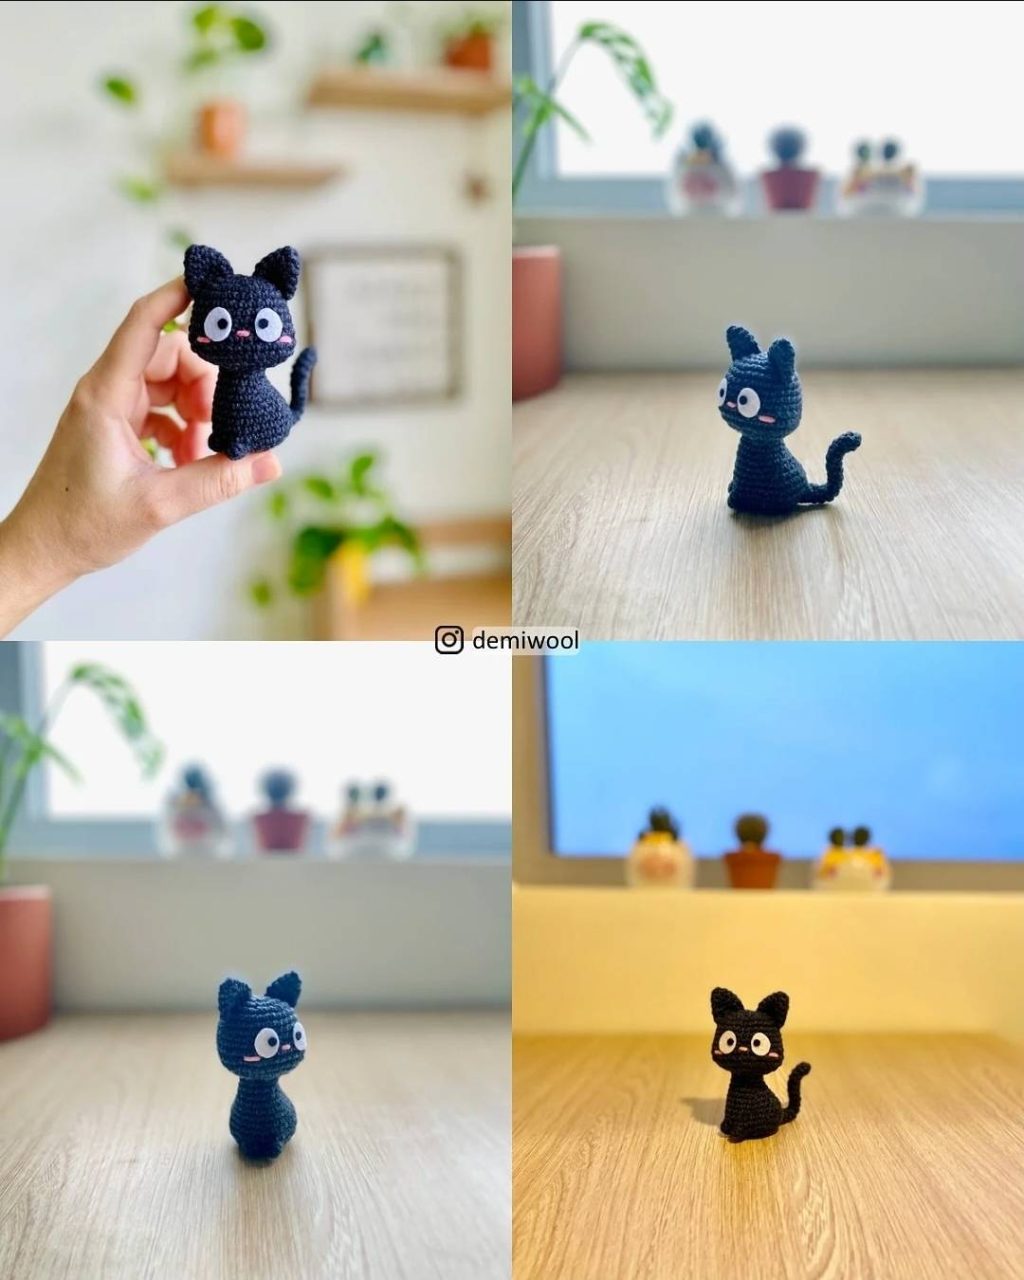
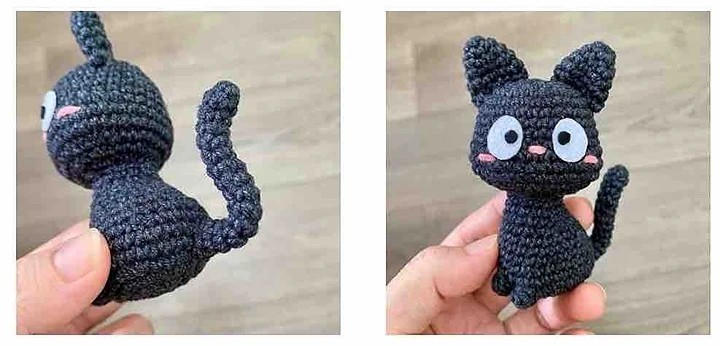
If you are a pet lover and especially cats, the small black Cat crochet pattern will definitely make you feel excited. With a cute appearance, soft curved tail and interesting big eyes, this wool cat will become a lovely little friend to accompany you on your desk or work corner. I collected it from @demiwool.
Materials:
1. Yarn: any cotton/sport/DK light weight yarn.
I used YarnArt Jeans (4ply, 55% cotton, 45% acrylic)
2. Hook: Size 2.0mm 3. Fiberfill
4. A short wire
5. White and black wool
felt to make the eyes
6. Stitch markers
7. Yarn needle
8. Scissors
9. Pins (optional)
Abbreviations:
MR: magic ring
R: round
st: stitch
ch: chain
sc: single crochet
inc: increase
dec: decrease
slst: slip stitch
BO: bobble stitch
Color: Black, a little bit of pink yarn to embroider the nose and cheeks.
Size: If you use the same yarn as me, the finished cat will be around 10cm/ 4inch tall.
HEAD
Using black yarn
R1: MR 8sc (8)
R2: 8inc (16)
R3: (sc, inc) x 8 (24)
R4: (2sc, inc) x 8 (32)
R5-9 (5 rounds): 32sc (32)
R10: 8sc, 4inc, 8sc, 4inc, 8sc (40)
R11-12 (2 rounds): 40sc (40)
R13: 8sc, 4dec, 8sc, 4dec, 8sc (32)
Stuff the head and continue to stuff as you go.
R14: (2sc, dec) x 8 (24)
R15: (sc, dec) x 8 (16)
R16: 8dec (8) (this round is optional, see following note)
Note: We will sew the head on at R15 unless you decide to add the optional R16. For my cat, I added R16 as it helps the head look rounder, neater. Again, R16 is an optional round. It will not affect the pattern.
HEAD (cont)
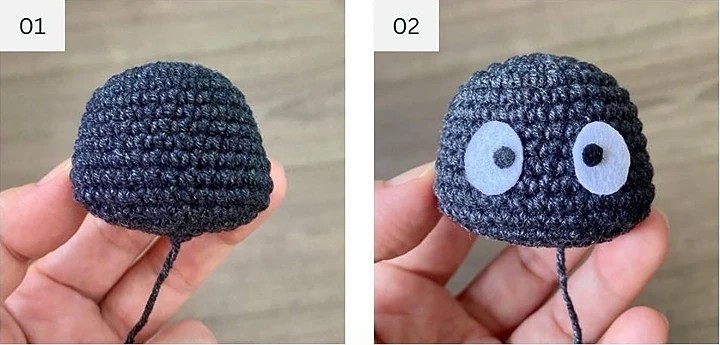
Fasten off, cut the yarn and weave it in (pic 1).
Use white wool felt and black wool felt to cut out two cat eyes, then glue them onto the face, between R6 and R11 of the head (pic 2).
BODY
Using black yarn
R1: MR 8sc (8)
R2: 8inc (16)
R3: (sc, inc) x 8 (24)
R4: (2sc, inc) x 8 (32)
R5: 14sc, BO, 2sc, BO, 14sc (32) (The BO will serve as the cat’s two legs)
R6: 32sc (32)
R7: (6sc, dec) x 4 (28)
R8: 28sc (28)
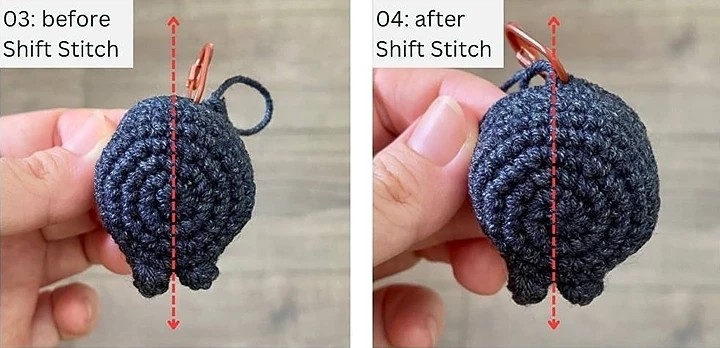
Starting from R9, we will decrease to shape the body. To keep it symmetrical, the Shift Stitch is necessary: add a few extra sc so that the last stitch of R8 is centered between the two legs. In my case, I added 2 extra sc to R8 (see Pic 3, 4).
You may add more or less than 2sc, or no need to crochet more sc depending on your cat’s body at this time. The key is to ensure that the last stitch of R8 is centered between the two legs
R9: dec, 3sc, dec, 14sc, dec, 3sc, dec (24)
R10: dec, 2sc, dec, 12sc, dec, 2sc, dec (20) R11: 20sc (20)
After completing R11, do the Shift Stitch again to make sure the last stitch of R11 will be centered between the 2 legs.
R12: dec, 2sc, dec, 8sc, dec, 2sc, dec (16)
R13-14 (2 rounds): 16sc (16)
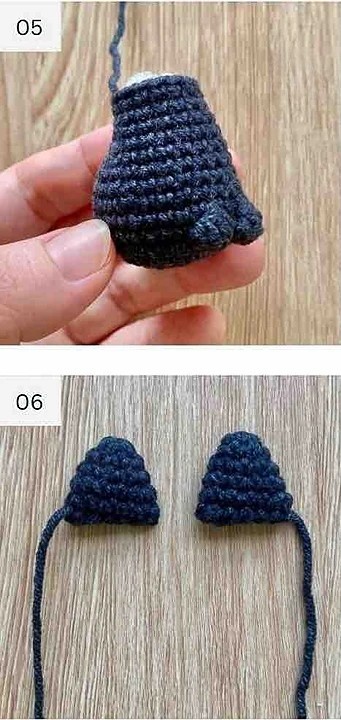
Stuff the body, fasten off, cut the yarn and leave a long tail for sewing (pic 5).
EARS
Make 2, using black yarn
R1: MR 6sc (6)
R2: (2sc, inc) x 2 (8)
R3: (3sc, inc) x 2 (10)
R4: (4sc, inc) x 2 (12)
R5: 12sc (12)
Do not stuff the ear.
Fasten off, cut the yarn and leave a long tail for sewing.
Fold the ear in half, sew 2 edges together (pic 6).
TAIL
Using black yarn
R1: MR 5sc (5)
R2-14 (13 rounds): 5sc (5)
Do not stuff the tail.
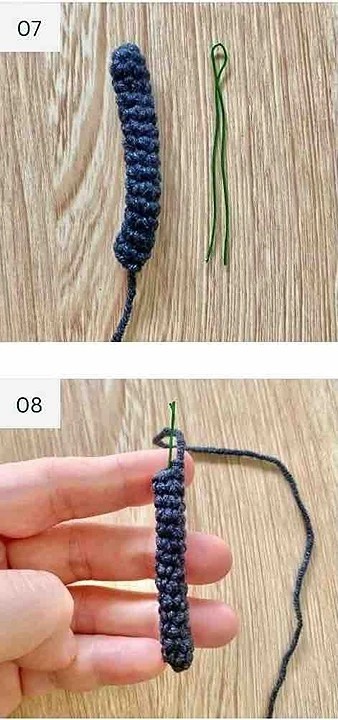
Fasten off, cut the yarn and leave a long tail for sewing (pic 7).
Insert the wire into the tail to make it easier to shape later (pic 8).
Trim the excess wire so its length matches the tail.
ASSEMBLY
– Sew the ears onto both sides of the head, between R2 & R7 of the head.
– Sew the head to the body.
– Sew the tail on the back, between R3 & R6 of the body.
– Shape the tail into a curve so it can support the cat’s body and help it sit steadily.
– Use pink yarn to embroider the nose between the 2 eyes and embroider the 2 cheeks right below the 2 eyes.
– Gently shape the cat’s body with your hands so the bottom is flat, allowing it to sit easily.
This will definitely be a great gift, not only cute but also a gift that carries your feelings to the recipient. Don’t forget to follow our website ngoclanhandmade.com and Youtube channel @ngoclanhandmade regularly to receive free crochet patterns.