Cupid the archer of love crochet pattern

Free Cupid the archer of love crochet pattern
Hello everyone, wish everyone a good day. Today I will bring everyone Cupid the archer of love crochet pattern. I hope everyone will like it. I collect @Pingpepper.
Materials
1. 4 ply yarn in beige, rust, brown and white
2. 2.5 m.m. crochet hook
3. yarn needle
4. pins
5. fiberfil
6. scissors
7. stitch markers
8. 6 m.m. safety eyes
9. toothpicks
10. paper tape
Abbreviations
ch – chain
st/sts – stitch/stitches
sc – single crochet
dc – double crochet
inc – increase (2 sc in one stitch)
dec – decrease (2 sc together)
hdc – half double crochet
sl st – slip stitch
blo – back loop only
flo – front loop only
(..) – repeat the instructions in brackets the given numbers of times
[..] – total numbers of stitches
Head
With beige yarn
1. Magic circle, 6sc [6]
2. *inc* 6 times [12]
3. *sc, inc* 6 times [18]
4. *2sc, inc* 6 times [24]
5. *3sc, inc* 6 times [30]
6. *4sc, inc* 6 times [36]
7-17. sc all around [36]
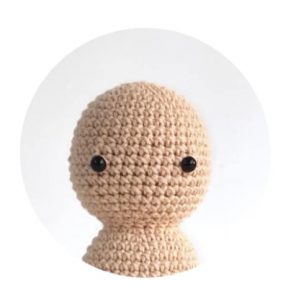
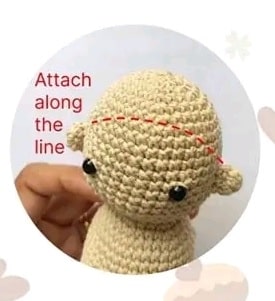
Place the eyes, 7 stitches apart, between rows 12 and 13.
18. *4sc, dec* 6 times [30]
19. *1sc, 2dec* 6 times [18]
20. sc all around [18] Stuff head.
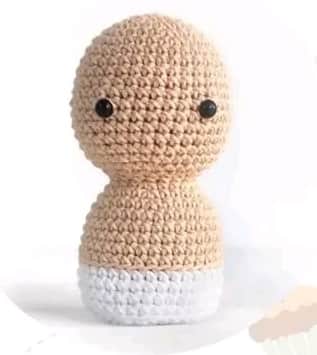
Continue crocheting the body.
Body
21. *2sc, inc*6 times [24]
22. *3sc, inc*6 times [30]
23. *4sc, inc*6 times [36]
24-28. sc all around [36]
Change colour to white.
29-32. sc all around [36]
33. BLO*4sc, dec*6 times [30]
34. *3sc, dec*6 times [24]
35. *2sc, dec*6 times [18]
Start stuffing.
36. *sc, dec*6 times [12]
37. *dec*6 times [6]
Fasten off and close the hole.
Ears (make two)
With beige yarn
1. Magic ring, 6sc [6]
2. sc all around [6]
Fasten off leaving a tail for attaching.
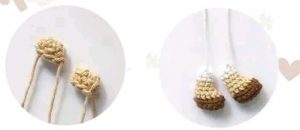
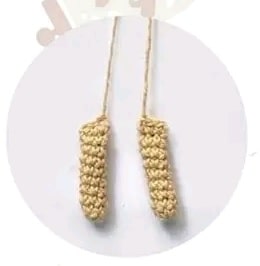
Legs (make two)
With brown yarn, ch 6
Crochet all around the chain from the second chain from the hook,
1. inc, 3sc, inc, turn; inc, 3sc, inc [14]
2. sl st all around [14]
Change colour to beige.
3. BLO sc all around [14]
4. 3sc, 4dec, 3sc [10]
5. 3sc, 2dec, 3sc [8]
6. sc all around [8]
Change colour to white.
7-8. sc all around [8] (two rounds)
Fasten off leaving a tail for attaching.
Arms (make two)
With beige yarn,
1. Magic ring, 6sc [6]
2-9. sc all around [6] (eight rounds)
Flatten and make 3sc through the front and back of the arm so that it is closed.
Fasten off leaving a tail for attaching.
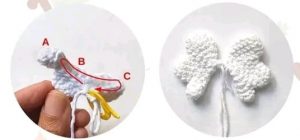
Wings (make two)
With white yarn, we crochet three parts:
A
1. Magic circle, 6sc [6]
2. sc all around [6]
Fasten off.
B
1. Magic circle, 6sc [6]
2. *sc, inc* 3 times [9]
3. sc all around [9]
Fasten off.
 C
C
1. Magic ring, 6sc [6]
2. *inc* 6 times [12]
3. sc all around [12]
Don’t cut the yarn.
Now we will crochet the parts together.
The letters (A, B, C) indicate which part to crochet on.
1. B-5sc, A- 6sc, B- 4sc, C- 12sc [27]
Mark the last stitch.
Now crochet normally in the round.
2. *7sc, dec*3 times [24]
3. *2sc, dec*6 times [18]
4. *sc, dec*6 times [12]
5. *dec*6 times [6]
Fasten off, Leaving a tail for attaching.
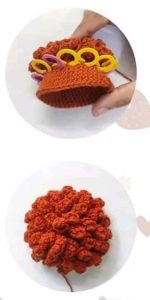
Hair
With rust yarn, we first make a cap for the head
1. Magic ring, 6sc [6]
2. *inc* 6 times [12]
3. *sc, inc* 6 times [18]
4. *2sc, inc* 6 times [24]
5. *3sc, inc* 6 times [30]
6. *4sc, inc* 6 times [36]
7. *5sc, inc* 6 times [42]
8-11. sc all around [42] (four rounds)
Fasten off leaving a long tail for attaching.
Now we will add curls to the cap.
To make a curl of hair: Ch 9. From the second chain on the hook,
*inc, 3sc(in one stitch)*4 times [20]
Slip stitch on the head cap, leaving two stitches gap between two curls.
Make curls between the rows (except for the first row), leaving a gap of two stitches between curls (i.e. curl on every third stitch). Mark the stitches with stitch markers before crocheting the curls, as shown.
Attach the yarn at the top and begin crocheting the curls from the first row. Don’t cut the yarn when you finish a curl. Slip stitch and continue with the next curl.
Row 1: 3 curls
Between rows 2 and 3: 6 curls
Between rows 4 and 5: 10 curls
Between rows 6 and 7: 14 curls
Between rows 8 and 9: 14 curls
Between rows 10 and 11: 14 curls
Fasten off, and hide the tail.
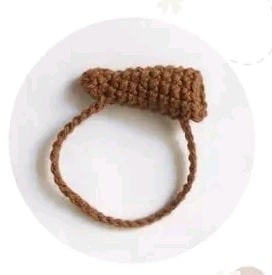
Quiver
With brown yarn
1. Magic ring, 6sc [6]
2-3. sc all around [6] (two rounds)
4. *sc, inc*3 times [9]
5-6. sc all around [9] (two rounds)
7. *sc, inc*4 times [12]
8-11. sc all around [12] (four rounds)
Fasten off.
Strap: Join the yarn at round 10.
Ch 30
Sl st on round 2.
Fasten off and hide the tails.
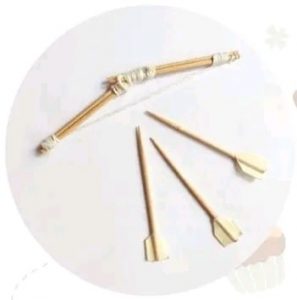
Bow and Arrows
Bow
Bind two toothpicks together on both ends, using white yarn.
Make two of this.
Now bind the two pairs together, at a slight angle.
Tie a piece of yarn from one pair to the other as seen in the photo.
Arrows
Stick paper tape to the edges of the toothpicks, sandwiching the toothpick between two pieces of tape. Cut the two corners to shape the rear of the arrow.
10. Assembly
1. Attach the ears on the sides, 5 stitches from the eyes, between rows 12 and 14.
2. Embroider the nose between the eyes.
3. Attach the head cap to the head leaving a gap of 6 rows above the eyes (See photo). Pull some curls down and attach to the face to hide the edge of the head cap.
4. Attach the arms on the side on row 22 of the body, approx. 12 stitches apart.
5. Attach the legs, 6 stitches apart, on the last three rows of the body.
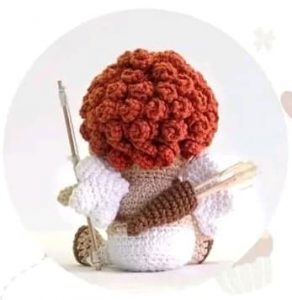
6. Attach the wings at two points on row 22 behind the arms. This will allow you to move them.
7. Slide the quiver in place from the bottom.
8. Add blush to the cheeks.
9. Put the arm through the bow and the arrows in the quiver.
Wishing you good luck with Cupid the archer of love crochet pattern. Don’t forget to follow our website ngoclanhandmade.com and Youtube channel @ngoclanhandmade regularly to receive free crochet patterns.

We are a group of volunteers and opening a new scheme in our community.
Your site provided us with valuable information to
work on. You have done a formidable job and our entire community
will be grateful to you.
Thank you.