Ken hat crochet pattern

Free ken-hat-crochet-pattern
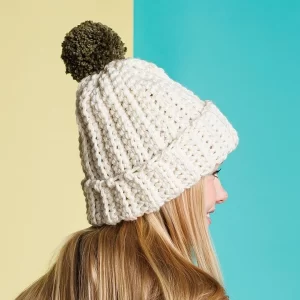
If you need a hat to cover the rain, sun, or simply a fashionable hat, this is a model you should refer to. In this article, let’s do it together. This is definitely the model I collect.
Pattern Overview:
Work this in amigurmi style, in spirals, marking your row start (or end, as you please) so you don’t lose track. No stepping up. This is written in UK style – US
Abbreviations to translate:
There is a flat hexagon top, and a strong 90 degree change of direction to go up the side, another turn for the brim and then another for the edge.
Materials:
1 ‘ball’ of Hoooked ribbon XL in your chosen colour, 9mm crochet hook
Large-eye needle (or smaller hook) to finish the ends (pull through inside).
Size: Medium, about 52cm, 20.5” inside around, probably fits most women. For a larger size, do one more increase row on the top before turning and work from there, but I think you might need another ‘ball’ of the yarn.
Tension: About 9 dc and 10 rows to 10cm (4”) with the 9mm hook.
Abbreviations:
dc – double crochet, (what the US calls sc)
htr – half treble, yarn round hook, yarn round and pull a loop through, as if you were doing a treble, but pull the next yarn round through all three loops on the hook to finish the stitch. (US, hdc)
Method:
Top:
Row 1: 6 dc into a magic ring.
Row 2: 2dc into each dc (12)
Row 3: (dc, 2dc in next dc) x 6 (18)
Row 4: (2 dc, 2dc in next dc) x 6 (24)
Row 5: (3 dc, 2dc in next dc) x 6 (30)
Row 6: (4 dc, 2dc in next dc) x 6 (36)
Row 7: (5 dc, 2dc in next dc) x 6 (42)
Row 8: (6 htr, 2htr in next dc) x 6 (48).
Start the side:
Row 9: dc into back loop AND the extra loop of the htr at the back of the stitch, all the way around (48). This makes the stitch sit upright on the base, but gives extra strength from the htr loop, and leaves a pretty edge ridge. You will see it looks a bit like the top of a crochet stitch but at the side, so it’s quite easy to do once you see it.
Continue with dc in every stitch for 6 rows more.
Next row (Row 16) htr in each stitch (48)
Turn for the brim.
Row 17: Into FRONT loop AND the extra loop of the htr at the FRONT of the stitch (not quite as easy as at the back, but still quite simple to do), (7 dc, 2dc in next dc) x 6 (54)
Row 18: (8 dc, 2dc in next dc) x 6 (60)
Row 19: (9 dc, 2dc in next dc) x 6 (66)
Row 20: (10 dc, 2dc in next dc) x 6 (72)
Row 21: (11 dc, 2dc in next dc) x 6 (78)
Row 22: (12 dc, 2dc in next dc) x 6 (84)
Turn up edge of brim:
Row 23: dc in front loop only of each stitch (no increases) (84)
Row 24 and 25: dc in each stitch. Finish row 25 with a single crochet in the last stitch, cut the yarn and pull into the back of the stitches to finish.